Managing webhooks
A webhook tells Walley where to send updates about your orders. Create, test, and manage webhooks on the Webhooks tab in Manage Organization.
Before you start
- You need the Webhook Management permission.
- Open Manage Organization. Select your name in the top right and pick it from the menu.
- Read the webhooks overview for the events you can subscribe to and how to verify the signature.
Create a webhook
- Select Create new and then Webhook.
- Fill in the webhook details:
- The HTTPS endpoint Walley should call
- The events you want to subscribe to
- The stores that should generate the events
- The authentication to use
- Select Create.
- Copy the HMAC key from the dialog that opens and store it safely. You need it to verify incoming webhooks.
Hover over an event or store to see more details in a tooltip.
Test a webhook
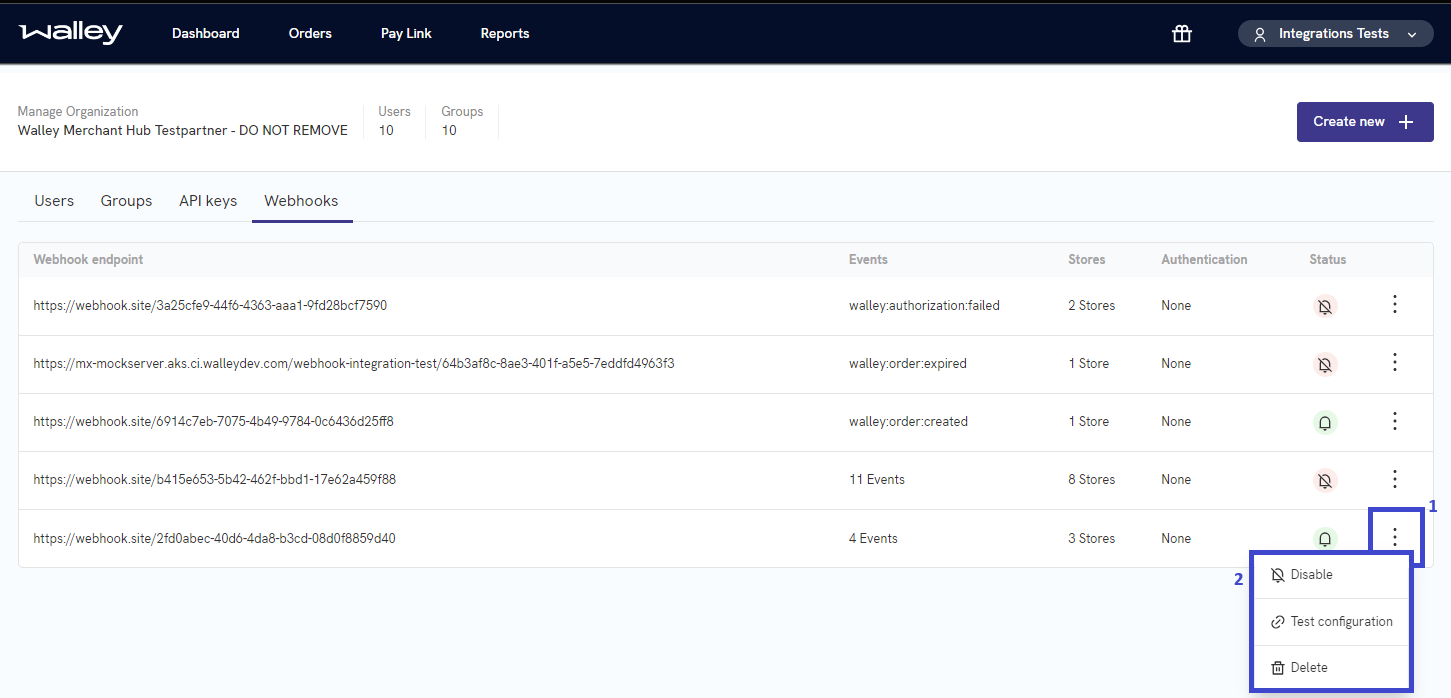
- Open the menu on the right side of the webhook's row.
- Select Test configuration.
- Choose the event to test.
- Select Test.
A dialog shows the response code from your endpoint. A successful test returns 200.
Disable or enable a webhook
- Open the menu on the right side of the webhook's row.
- Select Disable or Enable.
Delete a webhook
Deleting a webhook cannot be undone
Walley stops sending events to the endpoint as soon as you delete it.
- Open the menu on the right side of the webhook's row.
- Select Delete.
Failed webhooks
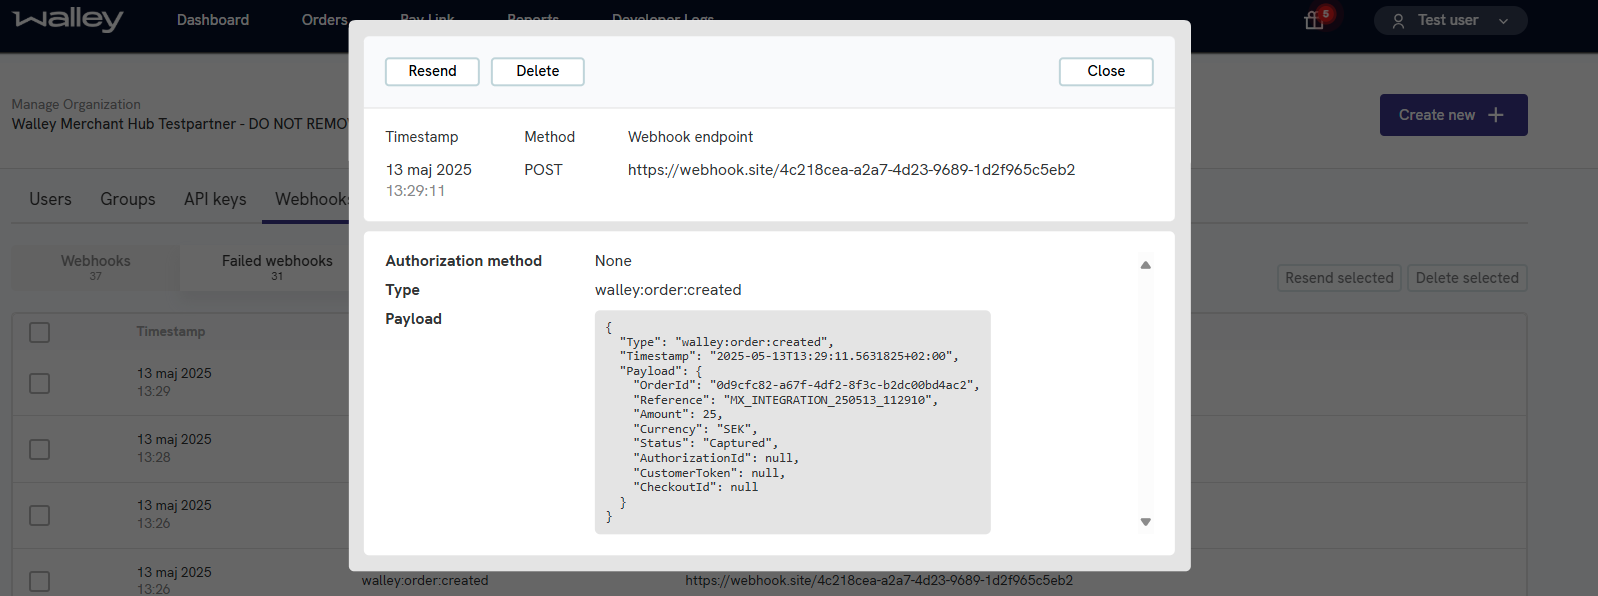
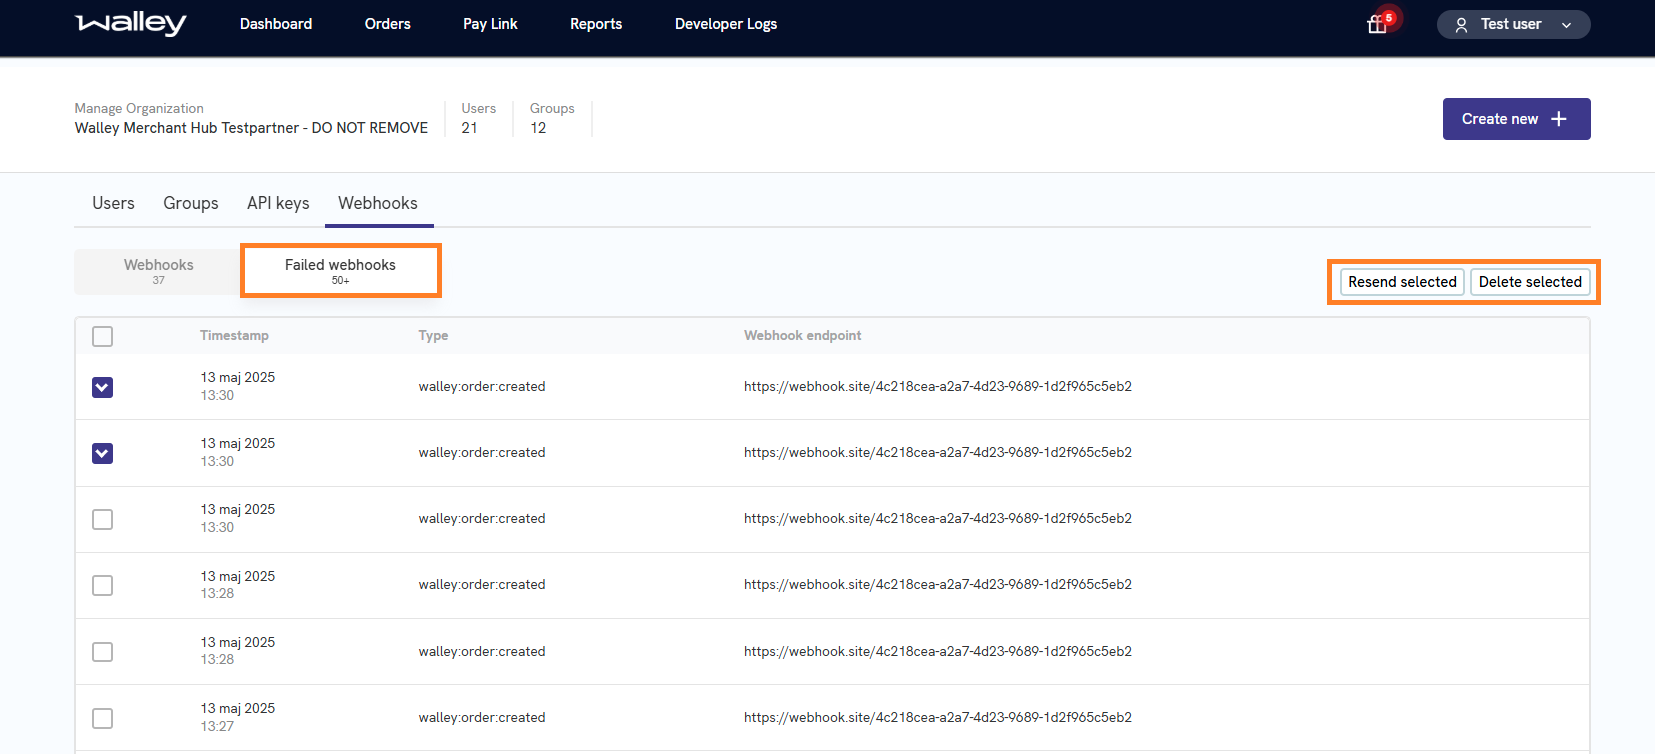
A failed webhook is an event that Walley could not deliver to your endpoint. Review them on the Failed webhooks tab.
- Tick the webhooks you want to resend or delete, or tick the checkbox in the header to select all.
- Select Resend or Delete.
Select a row to open the details of a failed webhook.